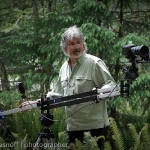
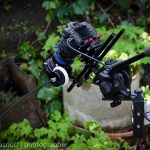
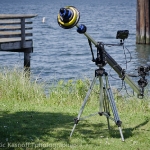
Longer lengths and Outside:
Back in part one of the review/test of the indiGo I mentioned having to pay more attention at its longer lengths to achieve fluid movements…After playing with it a bit more I find myself needing to humbly retract that statement.
 Much to my delight this jib seems to get easier to use and floats/controls even more effortlessly at it’s 7 & 8’ extensions. Now this could just be my growing familiarity with it, but I now find myself easily directing/guiding it exactly where I want it with just a few fingers. This is nice.
(A part of this improvement can probably be attributed to a feature I somehow overlooked when I first started using the jib…a sliding rod on the tailstock that is used for really fine tuning the balance. More on this later)
Setting the jib up at one of it’s longer lengths is simple, tool-less and takes just a few seconds more than setting it up at it’s shortest 6’ size. Loosen the two tension knobs at the head end, remove the two retaining bolts, slide to new length and replace bolts…rebalance…done…you’re floating higher and lower.
 But be warned that there are three things I hadn’t thought of when first moving to the longer lengths. None of which are faults of the indiGo but more my having a “duh” moment, older eyes and a lack of “wingspan”.
The “duh” moment occurred when I realized (on location of course) that the longest HDMI cable in my kit was just 6’ 6″. Now luckily this still “kind of” worked by reconfiguring the monitor mounting plate, but it still stretched the cord to it’s fullest, put strain on the inputs of my smallHD Dp6 and Nikon D7000, and gave me reason to pause before attempting extreme movements. Not a good thing…remedy: A 15’ cable (and backup) soon joined the collection.
 OK, now the eye thing…my vision was giving me fits as the longer lengths seem to put the monitor just far enough away where I couldn’t drive from the head end and still comfortably see and work with my 5.6” monitor on the plate. Being totally dependent on the smallHD for framing my shots (and the peaking and false color features for exposure and racking focus), I contacted Reed and Chris at to see if I could borrow one of their larger Dp1 monitors for the tests only to find out that the line had been retired. (All of their efforts are now focused on the Dp6 and new Dp4)…Luckily they found an older “B” stock model in the back room and I was soon back in business.
So unless you plan on driving with your monitor mounted somewhere at the head end or on the camera itself (might be hard to see at times) you’ll need something larger than 5.6” to still be able to see it while racking or tilting with your tripod head when fully extended. Another option might be one of the new inexpensive wired or wireless follow focus units from Jag35 that just started shipping…haven’t tried/tested them myself yet but they sure look interesting.
 The third situation I encountered was lack of “wingspan” even at 6’1”…directly related to the problem above and my desire to pull focus or adjust my GenusTech Fader ND filter during some moves. Keeping the HDslr shallow depth of field look and feel yet staying in focus while traveling through a longer jibs arc requires a constant tweaking of the Bravo follow focus. If you’re not blessed with an NBA type assistant/focus puller and haven’t gotten one of Jag35’s new remote follow focus units, then the only option I can think of here is a really long Whip…My longest currently is 12” and I’m starting on a hunt for something significantly longer that will help in these situations. If anyone has a lead on a reasonably priced, longer length model please let me know.
 OK…now that “fine tuning” rod I overlooked. This is so cool. Not only does it allow you to easily fine tune the balance, it can also be used to reduce the overall weight needs by shifting the fulcrum point. That little 5” of movement allowed me to use pretty close to the same amount of weight at all 3 lengths. Less wear and tear on your back and tripod head. Sweet…Thank you Tim.
So now she’s proven herself to me at the longer lengths while still being reasonably portable out of the back of my Rover. Yes…there’s still a few things I would like to see on it including a vertical brake and a “tilt or pan/tilt” solution, but I’m working on those and have recently discovered and contacted a source for what seems to be effective, reasonably priced motorized pan/tilt option. (More on that in an upcoming review ;-)
Bottom line: She works well and is still very stable at the longer lengths and out of the controlled studio environment. And yes, the indiGo vehicle travels well. It’s relatively light weight (14 lbs), quick set-up/size options, overall stability, and all of the thoughtful little details Tim and indiGo include (mounting accessories, case etc), combined with its low price tag still have me smiling more than not.
For more information on the indiGo Jib by indi Systems contact:
Tim Ovel
Indi System
indifocus@gmail.com
319.504.3985