Always trying to give myself more visual and creative options I knew I needed to add a small portable, travel friendly Jib to my kit. After lots of research I’m torn between the Kessler Crane Pocket Jib, the EZFX Jr Jib and waiting for the Cinevate offering (sure to be great but not available till September) so I thought it might be worthwhile to see if I would be ok with a less full featured version while I figured out what functionality I really needed and would actually use before committing to one of the “Pro” models above.
The big question for me was, are these “budget” alternatives to “Pro” level HDslr accessories at all useful or are they so inexpensively (ok…cheaply ;-) built that they serve little purpose other than to frustrate the user. Will buying a less expensive version allow a shooter to get an idea of whether he/she will actually use the gear on shoots and then justify moving up to Pro quality? Are they functional enough to emulate the “real” version with some added effort and a bit of compromise? Over the next few weeks/months I’ll be testing and reviewing not only Jibs, but Sliders, Rigs and other “budget” accessories in an attempt to answer these questions for myself and hopefully other “convergence” or “crossover” shooters out there struggling with the same decisions.
But a travel friendly location Jib is next on my personal shopping list so let’s start there…
 The first of the “budget” Jibs I looked at was the indiGo Jib by indiSystems. When I chatted with Tim Ovel, the indiSystems owner, I was impressed by how passionate he was about creating the best tools he could at the lowest price possible. In contrast to the jib manufacturers above, who cite custom building each component themselves as a major feature of their equipment, Tim readily admits that a big part of how he keeps costs down is by sourcing and building with only pre-existing/off the shelf components. He seems comfortable with his products place in the gear pecking order and very outspoken in his belief that accessory gear should not cost more than the camera. (Please don’t let my wife hear that ;-)
 The indiGo jib arrived the following Monday as promised. This was a nice surprise as during my research I talked to more than a few “budget” gear suppliers who turned out to be flakes and scammers. (I’d be happy to share this information and my experience with anyone offline) Seems that the first thing to go at this price point is customer service. indiSysems follow-through and friendly, results oriented attitude was an exception and should bode well for future customer service.
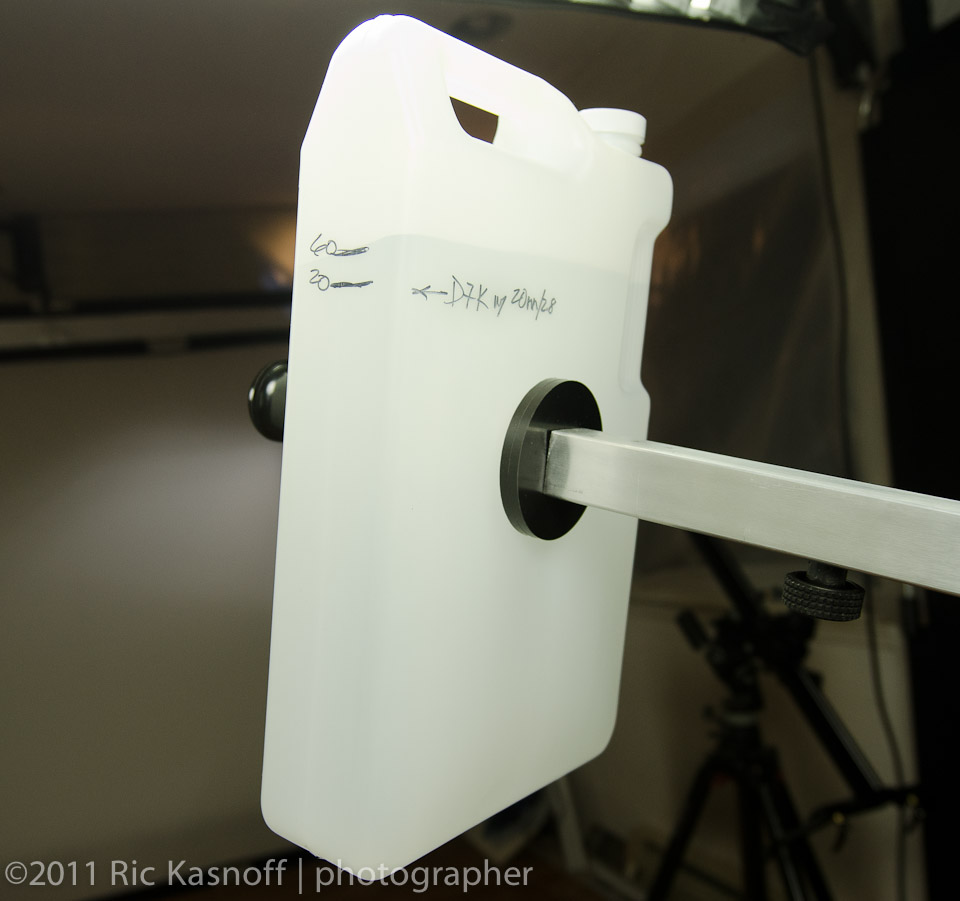
The jib comes with a hard plastic case and I was plesantly surprised at how lightweight the total package was. The case was the first of the little “extras” that I hadn’t expected at this price point. A second package contained the optional water jugs that could be used in lieu of packing and carrying big heavy standard weights on location. Yet another nice touch.
 Assembly was very quick, easy and tool-less. The only pieces I need to add were standard circular weights (if I chose not to use the water jugs), and a few strap-on 1lb ankle weights for fine tuning the balance. In a few minutes I had it mounted on an old set of sturdy Manfrotto sticks/501 head and one of my Nikon D7000’s, complete with the dslr plate, rods and Bravo follow focus from my GenusTech rig, was floating around the studio. My smallHD Dp6 monitor found a nice home on the well thought out monitor arm located above the tripod where it was easy to view while flying from the back or the side.
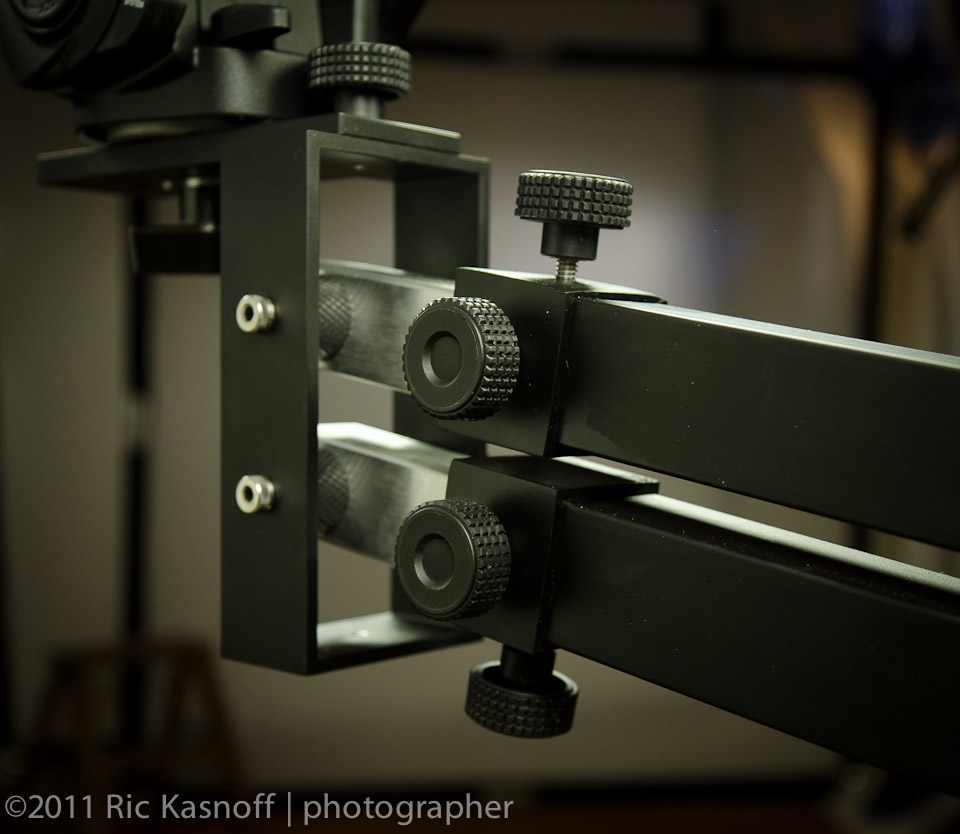 The indiGo Jib itself is a vertically stacked “single” bar design featuring a center mounted camera platform which seems to provide a bit more stability than the side-mounted types I’ve tried. This design is unique for a budget jib in that it also incorporates a telescoping ability, easily extending from it’s minimum assembled 6’ size to 7 or 8’ with the removal of 2 bolts. With a little practice (and by focusing on good two-handed technique) I was soon getting pretty smooth shots without much bounce or drift. (Though when I moved out to the longer lengths I had to concentrate more on my moves as the trade-off of size/weight and stability was a bit more obvious…but still manageable…more on this in part two).
As usual my testing began up close with macro lenses and moved out from there. This quickly highlights any stability and control issues for me. My theory is that if you can get decent macro/close-up work with any of these camera moving devices, longer, more “normal” shots should be easy. Take a look at the video below and you’ll see that with just a few hours on it I was able to get some pretty solid shots at the shorter length with both a 60mm macro and a 24-70mm zoom.
 Initially I was worried that the lack of a vertical brake or manual tilt would hinder the usefulness of the jib, but found with a decent amount of mass and really dialing in the fine-tuning I could get pans and sweeps at any angle with no drop or drift on the arm. I’d still like to see a vertical brake built-in for safety if nothing else. (talked to Tim about this and he suggested a rubber or silicone wedge much like a doorstop…tried it and while not very elegant, it works ;-) The lack of a manual tilt function is still something I’m working on figuring out and may have to resort to using the little Bescor pan and tilt motor that we have. We’ll see.
Mounting it to a tripod dolly and running it on tracks proved to be no problem. Even as light as it is, it showed little or no sway/bounce at the end of fairly brisk tracking shots as long as you keep both of your hands on it as guides and dampeners.
 I’ll add more as I get a chance to take it outside and shoot more “normal” jib/crane shots with it (I’m in Seattle so that may be a while ;-), but overall I’m impressed with the unit. It’s very light for it’s size but seems well built to close tolerances. indiSystems/Tim has added some nice touches like a hefty, adjustable and nicely machined LCD mount, an easily invert-able camera mount, big and comfortable grippy surfaced knobs, the tool-less assembly, travel case and (optional) water jugs making this seem like a workable choice for an easily transportable, reasonably affordable entry level (and beyond?) jib.
Bottom line: I was comfortable and confident enough with the unit after a few hours of practice to pull it out on a boxers promo shoot and a series of product review shots where it definitely added value to the shoots. I found that yes, you do have to be a little more careful in your technique and yes, you do give up some nice features that are “normal” on the Pro models mentioned above, but for a relatively low cost, entry level Jib this is a unit that deserves a close look.
At $349.00 or $399.00 (with the jugs) it won’t put too much strain on your budget while you figure out if your shooting will benefit from all the free floating freedom a Jib can give you.
visit the indiSystem website for more information
Part 2 of this review (Outside and fully extended) HERE