DitoGear Omni Slider Servo Review
Part 1 of 3
First look and basic feature tests
 After owning and using a lower cost motion control system I was looking to upgrade to a one that had a greater degree of controllability, repeatability and accuracy while not requiring a degree in computer science or physics to understand and operate it.
For the last few weeks I’ve had a chance to play with (err test ;-) the newest addition to the DitoGear line of motion control sliders, the “OmniSlider Servo”.
I first learned about DitoGear and the OmniSlider as I checked the credits after watching the incredible “The Chapel” and “Steel Life” and found that Patryk Kyzny and Robert Paluch, the creators of those movies were also the founders and driving force behind DitoGear. ‘nuff said…I had to check this out.
One of the first things you notice when you see the DitoGear Omni slider is it’s sleek elegance and high degree of fit and finish. From its brushed aluminum extruded rail to it’s stylishly designed accessory pieces it seems like something that could have come from the design shop at Apple.
And much like the toys from Cupertino, that sleek design houses an easy to use, versatile and surprisingly powerful creativity tool.
 The basics:
This newly released version of the Omni slider replaces the original stepper motor with a more powerful and much more accurate servo type and sets the stage for a number of cool upcoming additions that we’ll touch on later.
The version I have is the 1.5m. It actually comes in at 72” overall and weighs 24 lbs in it’s “basic” configuration without cameras or any extras like the double mount or feet. Not exactly backpacker friendly but, as I’ve been finding out, it’s workable.
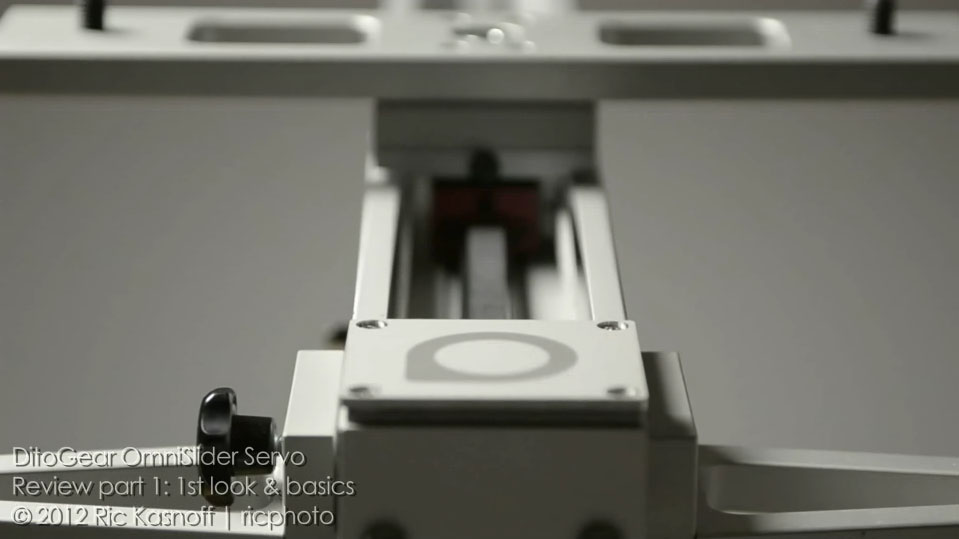
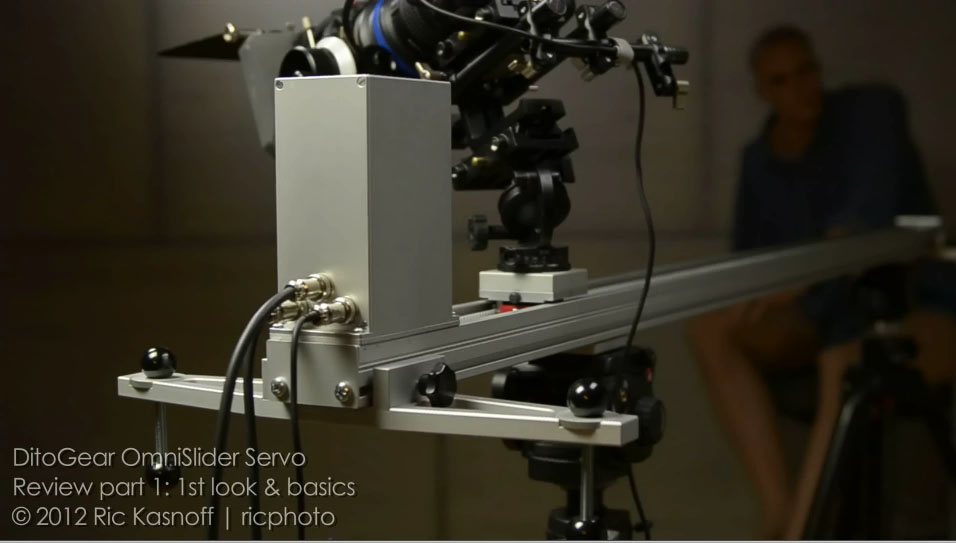 The servo motor and its electronics are mounted at one end of the rail in a weather resistant, silicon sealed housing. Seems a bit different for people like me who are used to everything being on the carriage (camera, controller, motor, battery). This configuration, with running cables and the off balance weight, took a little extra thought the first few times I used it but I quickly caught on and can now see the sense/flexibility in it. (Note: for those of us with size 13 feet that always seem to get in the way…it takes a little longer ;-)
After a few weeks I’m finding the only thing I still have to think about is not hanging the controller from my pants pocket and walking away for coffee…which I still do way too often.
To power the unit the basic package comes with both an AC adapter and a SLA (sealed lead acid) 12 volt battery (the brick ;-). The battery comes with a charger, spare fuses and a nice custom case with a shoulder strap which makes it handy for using it to steady a tripod or as a counter weight when booming out the rail.
All cables are heavy-duty XLR screw-on connector types and run about 8-10’. Battery and controller cables are included in the package as is one camera specific control cable (also heavy duty with an XLR type connector at one end). Each cable conveniently has a different pin configuration (2-4-5) so mixing them up while working in the dark is not a problem.

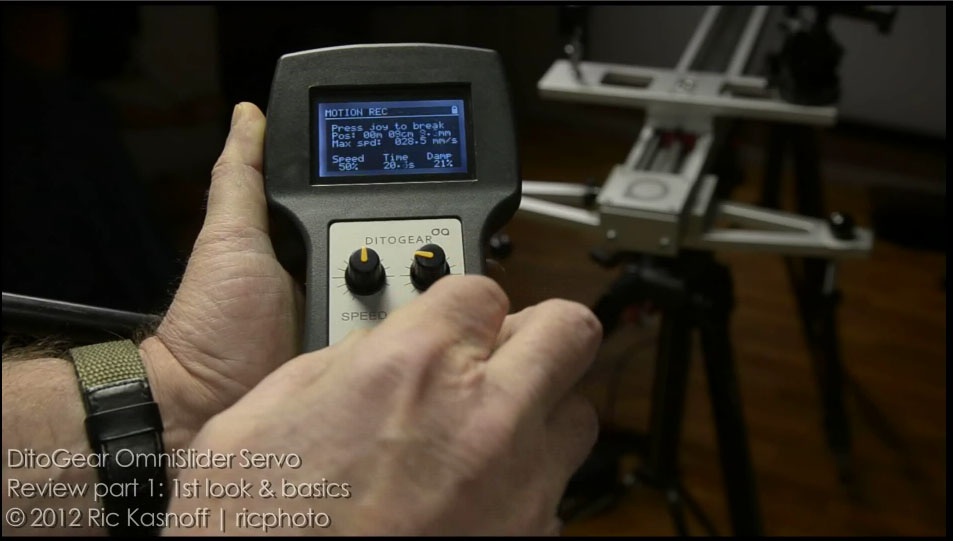 Although the controller seems a bit bulky at first, it’s nicely designed and very light. Driving the device is surprisingly simple with a clickable joystick providing access to, and navigation within, a very logically laid out menu. The two additional knobs on the face of the controller provide real-time control of speed and dampening (otherwise known as “ramping”) with instant visual feedback in the large, easy to read, LCD screen.
On start up you find yourself in the main menu and click-toggle to access all functions from there. One of the handiest features I’ve found is that each sub-menu is self contained so you’re not having to hop all over back and forth to set up the parameters for a shot. For instance: say I want to record a move and then pay it back in real time then slow motion then time-lapse…all of those options are contained within the same “recording” sub-menu so I don’t have to skip over to the TL menu after the video menu after the recording menu etc…very efficient.
Getting the unit set-up and started is simple. Just go to the settings menu…chose device, then length, then calibrate the carriage to the controller by driving it to the start position at the end of the rail and you’re done…about 20-30 seconds and you’re ready to go.
One thing that did have me a little concerned when I first saw her was the size of the carriage…It’s less than 3” wide and it didn’t seem like something that small would be able to handle any torque stresses from heavy, out of balance camera rigs. A few tests with a fairly heavy, (deliberately) off-balance camera rig quickly put those fears to rest.
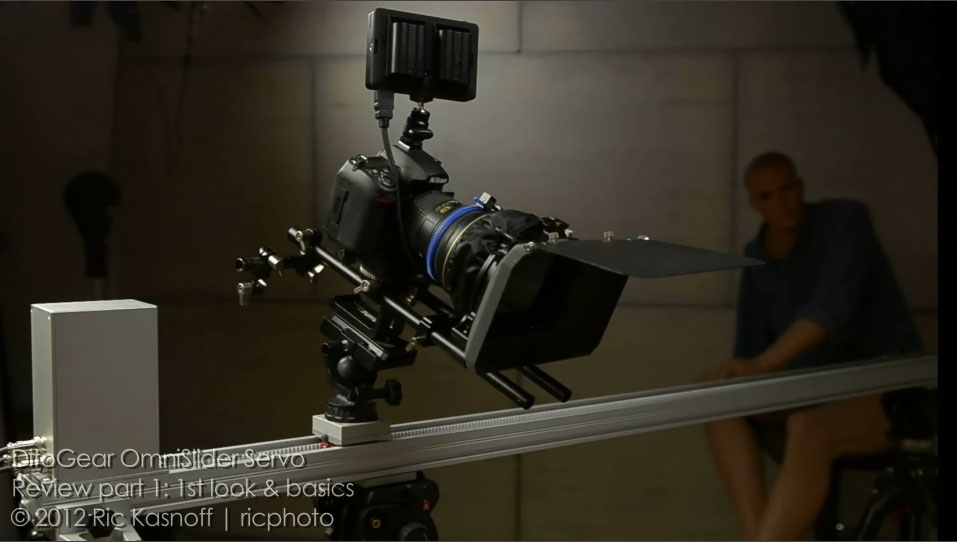 First I ran a simple escalator pass on my test dummy Natasha with my basic run and gun shoulder rig set-up minus the shoulder brace and handles. This I had mounted on an Accratech ball head in a front heavy configuration that should have added quite a bit of torque to the carriage:
– Nikon D7000
– Nikon 24-70/2.8 lens
– SmallHD Dp4 monitor
– GenusTech follow focus
– GenusTech Wide Matte Box
– GenusTech rail system with 2x Manfrotto QR plate
As you can see from the sample video the pass was smooth as silk…no drag or hesitation.
OK… for my next test passes I added an 18″ “whip” to the Bravo Follow Focus and tried a counter-motion tracking focus run followed by a simple motion rack focus in an effort to see how stable the rig would be if I was “playing” with it during the move… Neither of these combination moves showed any sign of a transferred movement.
The unit utilizes a captive bearing system guided by a shaped stainless steel center rail. Though physically small it displays an incredible resistance to torque no matter what I threw at it and how off-balance the load was. Obviously this bodes well for being able to interact with the camera while in motion and for the addition of pan/tilt device down the road…
The doors marked “possibilities” just keep on opening up…
But I still had one more stress test in mind…a fairly heavy, cantilevered camera rig on a vertical run.
 To really stress test the OmniSlider I loaded my camera rig with:
– Nikon D7000
– Nikon 24-70/2.8 lens
– SmallHD Dp6 monitor
– GenusTech follow focus
– GenusTech Wide Matte Box
– GenusTech rail system with 2x Manfrotto QR plate
– Accratech ball head
– Cinevate 100mm bowl and ball
– Cinevate “Dromos” riser
Right around 15 lbs of gear total…
I used the (really cool ;-) “Dromos” not only to get camera clearance from the rail but to “cantilever” the load out a ways and add stress to the carriage…oh well…nice try.
Now my previous systems would have stuttered with half that load while the OmniSlider just purred along smoothly…watch the video of Sven (another of my light test dummies). Not a quiver even during the stops, starts and direction changes…color me really impressed.
 The next feature I wanted to test before taking her into the field was the “Motion Recording” and playback function. I’ve been experimenting with compositing/overlaying HDR time lapses with video footage and the ability to accurately repeat moves is a key to my being able to take these experiments further.
The OmniSlider has the ability to record 80-second moves and then “play” them back in slow motion (with any factor), real time, stop motion or either of two flavors of Time-lapse modes, continuous or DSP (drive-shoot-drive). Note: it’s not just the “moves”, but any speed / direction changes and pauses that are recorded.
I setup a very basic product shot with a watch, stripped the camera down to it’s essentials and recorded a simple slide-in reveal, pause and slide-out shot then proceeded to re-play it while recording in video at slow-mo, then real time and finally in time-lapse DSD mode…(see video for TL example).
I was actually surprised to find out that most difficult part of doing this was the calculations when I was plotting moves that I recorded in “real time” and was planning on playing back / shooting in a factored slow motion mode…I’m a photographer so I don’t do math really well…I eventually ended up drawing a timeline with arrows and numbers so I could visualize the relationships and all was well.
Like I mentioned previously, the recording interface/menu was dead simple and very efficient with all of the playback modes contained as sub-menu items within it. No hopping from one menu to another. The thoughtful folks at DitoGear made this feature deadly accurate and easily efficient to use…thanks guys…
There’s still many more features and functions I haven’t touched on here that I’ll get to in parts two and three but that’s it for part one.
Summary:
I’ve run her through her paces enough that I’ve gotten comfortable with setting it up and reconfiguring her fairly quickly. Controlling her is getting to be second nature (but I do have to stop walking away from it with the controller hanging from my pocket… ;-)… I was a little concerned at first with moving her mass around as a solo shooter but have found with a bit of practice and a number of dry runs she now travels, sets-up and re-configures fairly quickly and almost painlessly.
At this point I have only found one thing that makes me go “Huh…Y de do dat?” and 2 small software issues:
One is a menu re-set that Patryk says shouldn’t be happening…for some reason my controller needs to be re-set/calibrated every time it’s started. Not a big deal as it takes less than 30 seconds, but it makes me stop and think of something other than my shot when I should just be thinking about my shot.
Secondly I’m a Nikon shooter and have both D3’s and D7000’s. The D7000’s work great and all of the video/TL footage for the tests were shot with them but there seems to be a gremlin in the interface with my D3’s and the Omni. They’re puzzled by it and are testing and trying to figure it out. As I really prefer to use my full frame D3’s for TL, and especially Starlapse, I’m anxiously awaiting an answer/solution here.
Lastly is the feet…Maybe it’s just me and the fact that I shoot outdoors on uneven terrain a lot and I’ve been spoiled by the all-terrain feet that Cinevate makes, but I find the feet for the OmniSlider (an optional accessory) are not the most user friendly or quickest to set-up. A lot more flexibility and much quicker set-up are needed here. Long, fine screw adjustments just aren’t making it for me.
Just 3 little niggly points which are mostly being taken care of by their (really responsive) customer service department…pretty good so far I’d say ;-)
On to the creative stuff…
 Part Two highlights my taking/using it on location for a short I’m working on of Mount Rainier: Packing, traveling, shooting day and night motion time-lapse, battery usage and accessories like the “Dry Eye” lens warming system. I’ve shot most of the footage and done a lot of the tests already so it should only be a week (or so ;-) before I post that…follow me on twitter ( @ricphoto ) to find out when.
Part Three will be back in a controlled environment testing more features like stop motion, doing a few sound tests (she’s actually really quiet) and hopefully testing the new pan/tilt and lens driver that are due out soon…
Have fun…Ric